Arch Linux WriterDeck
📆 2026-06-02 10:16
This is just something I wanted to make after seeying VeronicaExplains's post about how she created her own writer deck[1] using Debian and an old laptop she had.
It's time to talk about my writerdeck - Veronica Explains.net
She also has a very nice video showing off her writer deck at:
Writerdeck: my tty-only laptop for maximum focus (YouTube)
I really like her choice regarding tmux, vim, vimwiki and colors but I really don't think Debian is the best option for a writer deck as it installs some stuff you really don't need just for text and distraction free writing. With Arch, we'll install only:
- a minimal system,
- tmux,
- vim,
- vimwiki[2],
- kmscon,
- syncthing,
- a nice font like JetBrains Mono,
- openssh and
- rsync as another backup option
Why I think my approach is better?
First of all, less bloat. I'm using Arch, btw! I added a few improvements like autosaving files, a few useful keybindings for vim and vimwiki and enabling the ssh daemon so you can use the writer deck from another device. Half of this post was written from my android phone connected to my WireGuard VPN at home, logged in via ssh into the writer deck and, because we are using tmux, it's like I'm using the laptop/writerdeck. Same keybinds, same files and same colors. The only difference is the screen size :). On my phone, I am using the Android app called Termius[3].
Links
Screenshots and videos
If you like what you see in the screenshots and videos below of my take on a writer deck using Arch Linux read on.
Screenshots
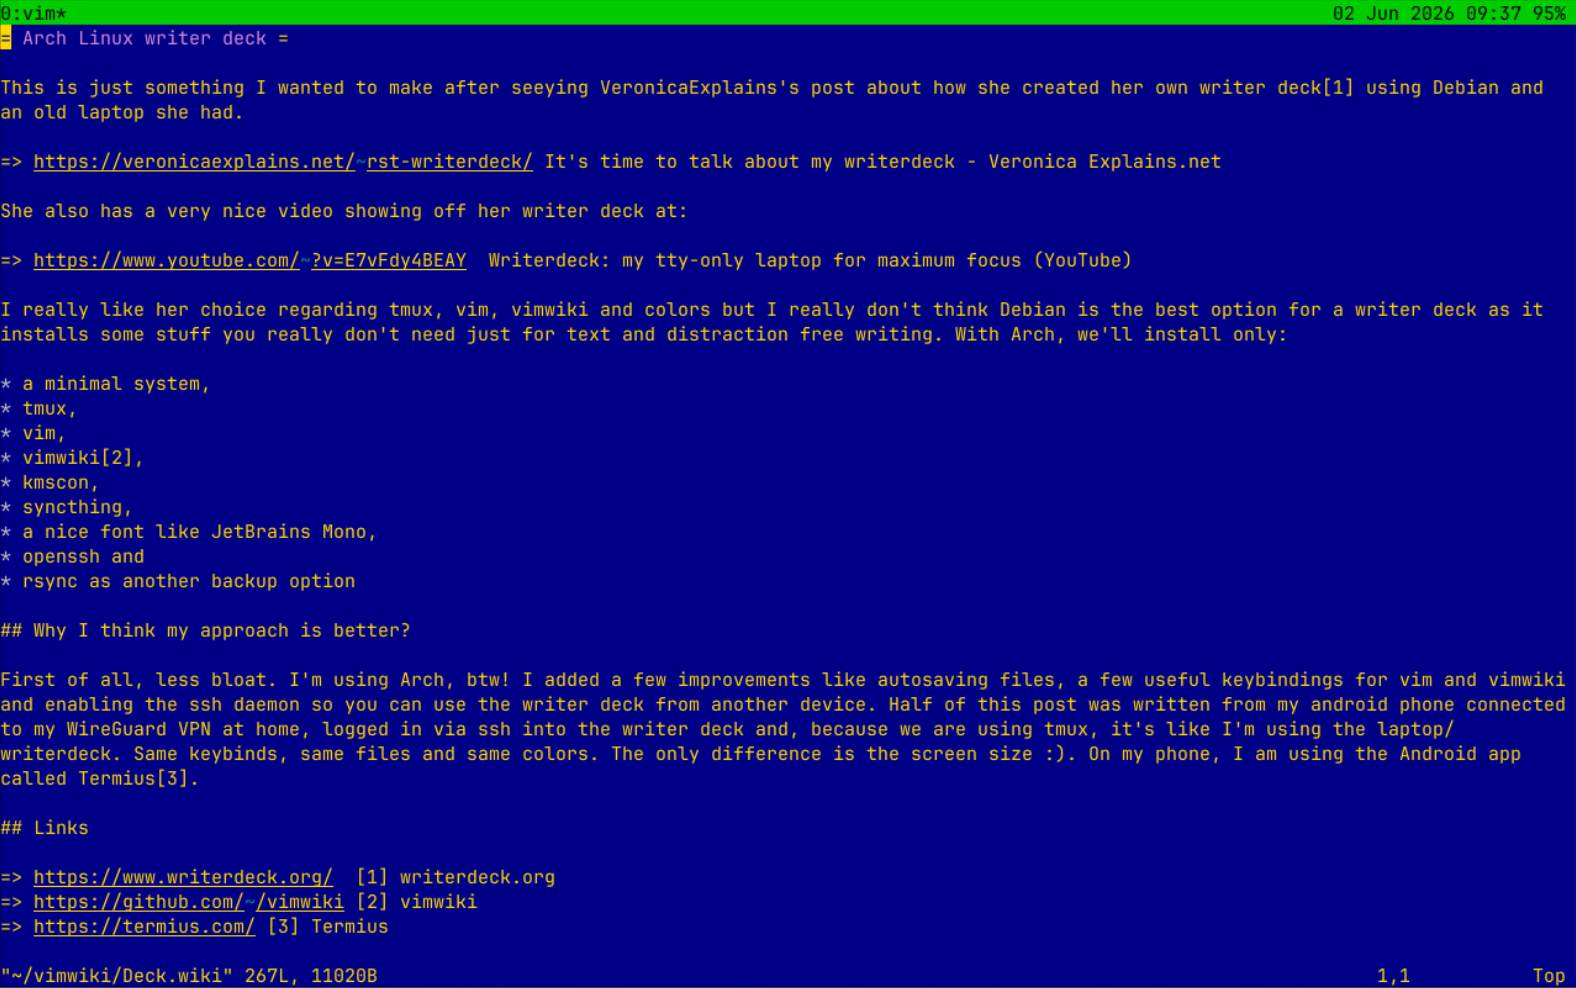
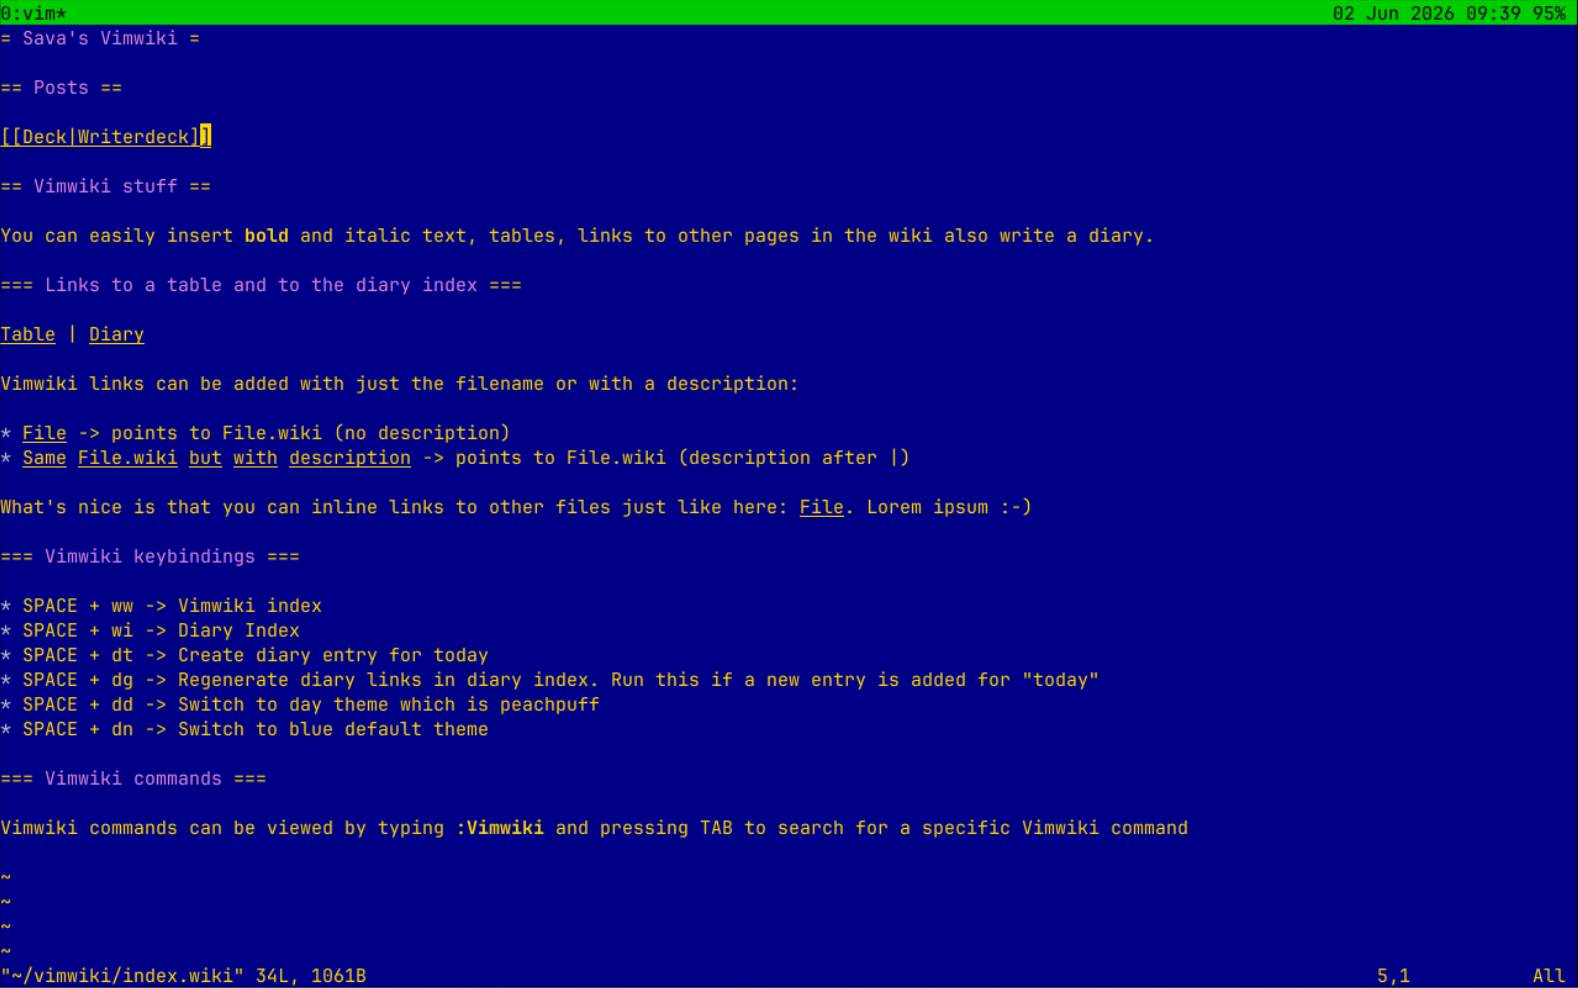
Vimwiki Index opened in vim which is opened in tmux
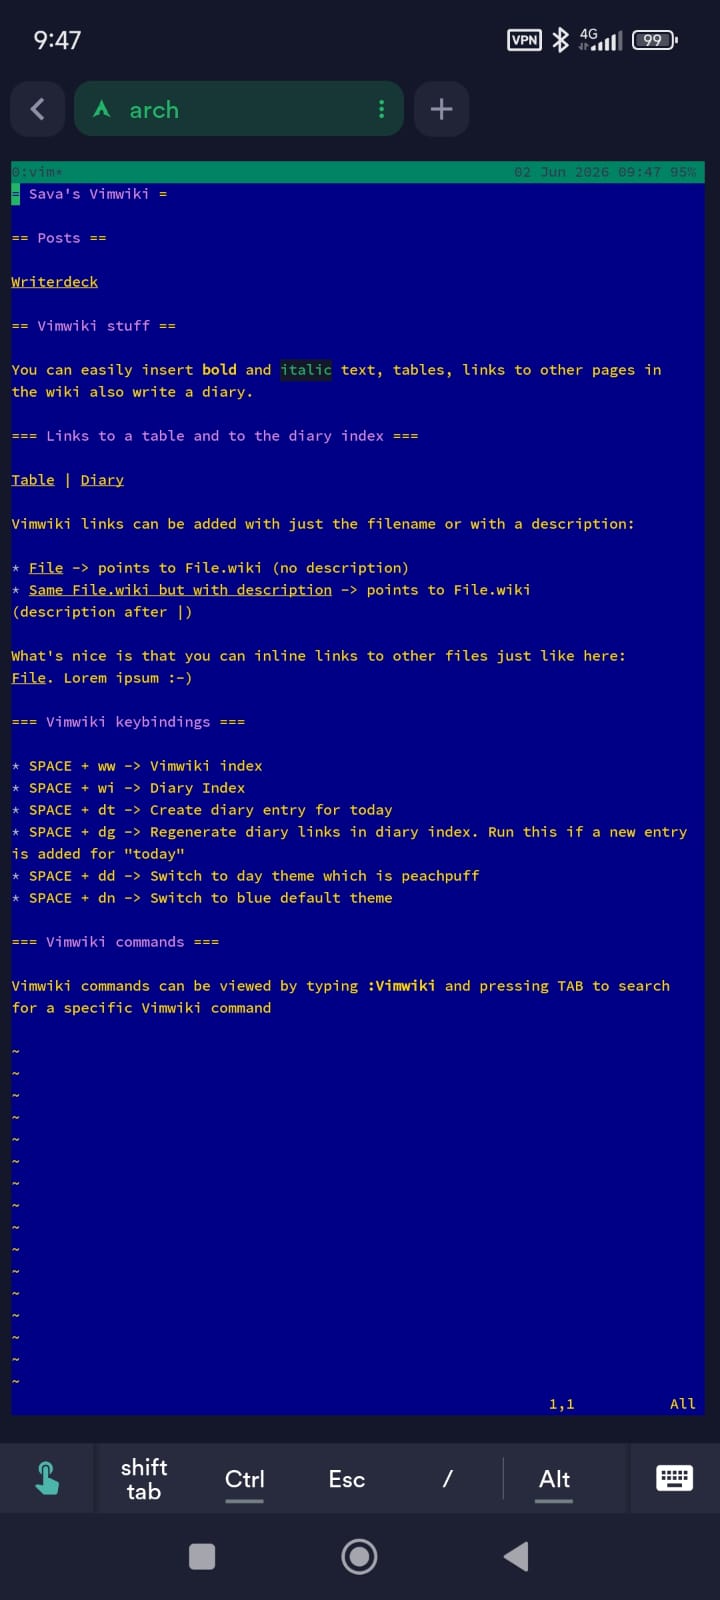
The writer deck on my Android phone
Videos
Arch Linux writer deck boot ( Inside vm )
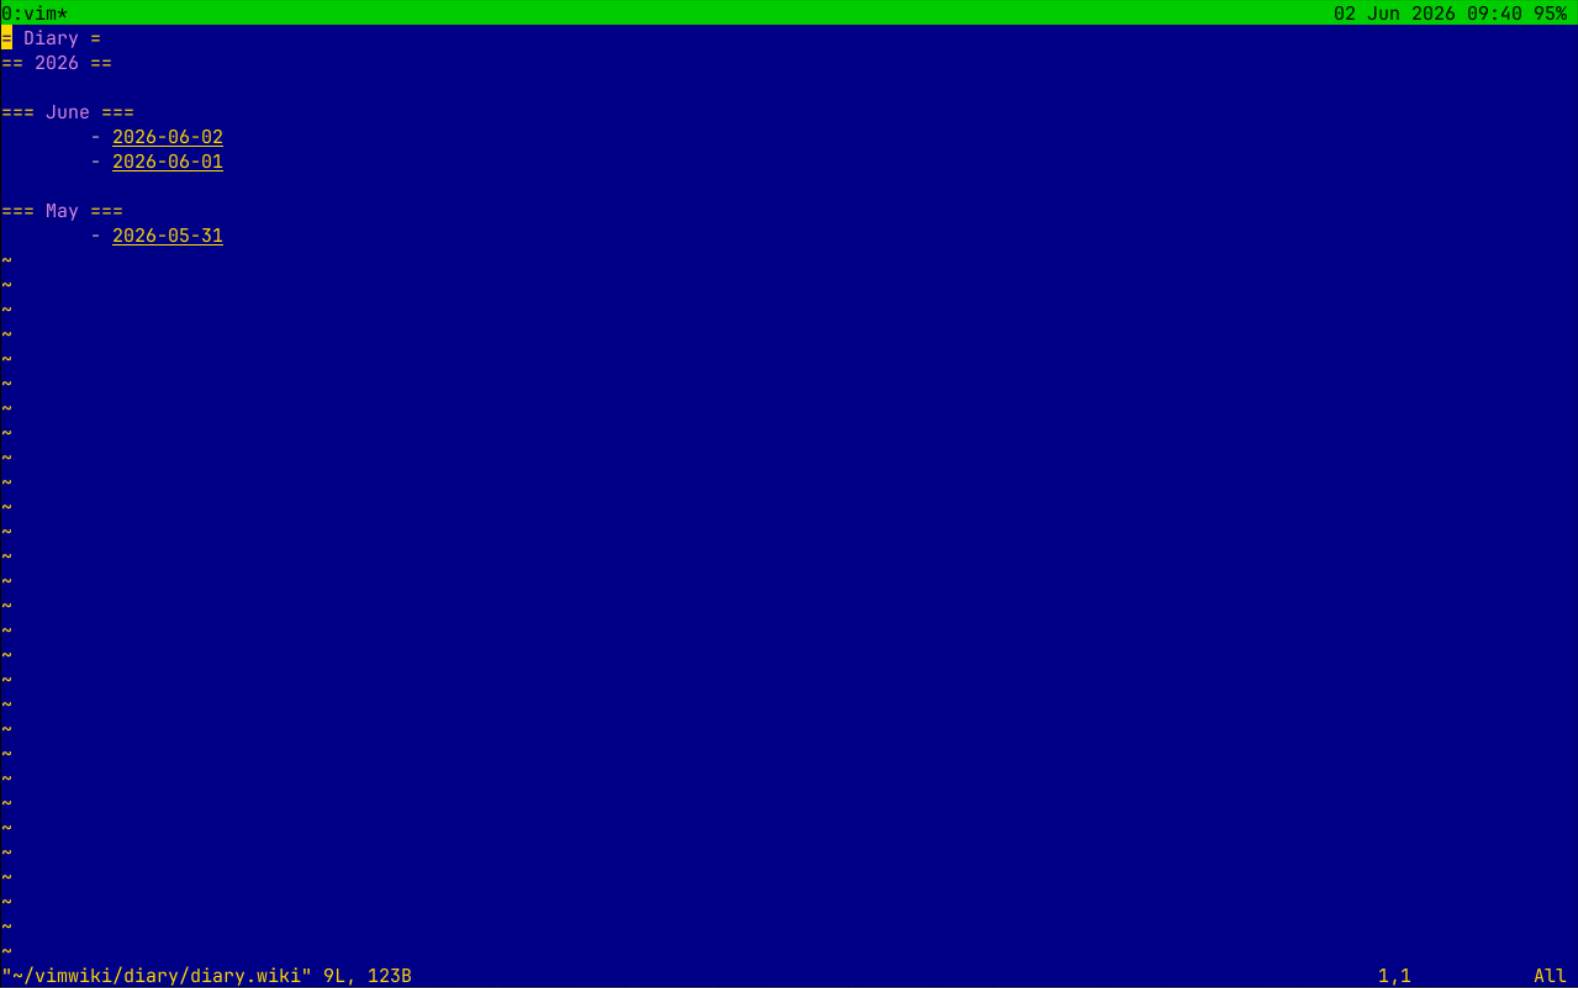
Vimwiki features: tables and diary
These recordings are made inside a VM with the same settings. Enough small talk, time for some commands :-)
Install a minimal Arch linux
Installing Arch Linux can be a pain but if you know what you're doing it is quite easy. With just a few commands you have a minimal system installed and ready to go.
You can follow the guide linked above to install a minimal Arch on your device with this small modification: when you run the pacstrap -K command install only what's needed for a writer deck like the list below:
As you can see I chose to install only the:
- base - minimal Arch userspace. Contains essential tools and libraries required for a functional system.
- linux - the standard Arch Linux kernel.
- linux-firmware - firmware blobs needed by hardware such as Wi-Fi adapters, GPUs, network cards, Bluetooth devices, etc.
- base-devel - development toolchain and build utilities (e.g., gcc, make, patch, fakeroot).
- vim - terminal-based text editor which we're gonna use with vimwiki
- grub - bootloader that loads Linux at startup. Can boot multiple operating systems.
- efibootmgr - utility for managing UEFI boot entries from Linux. Usually used when installing GRUB on UEFI systems.
- networkmanager - Provides the nmcli command-line tool to help us get online for syncing.
- tmux - terminal multiplexer. Lets you create persistent terminal sessions, split windows, and reconnect after disconnecting.
- kmscon - Kernel Mode Setting Console. A modern replacement for the Linux virtual console with better Unicode and font support. It will provide a graphical-looking text console without X11/Wayland for our writer deck.
- syncthing - peer-to-peer file synchronization service. Keeps folders synchronized between computers without relying on a central cloud provider.
- ttf-jetbrains-mono-nerd - JetBrains Mono Nerd Font. It includes programming ligatures plus Nerd Font glyphs/icons used by many terminal applications and prompts.
- git - needed to clone vimwiki repo. Also useful if you plan on backing up your notes in a repository.
- rsync - optional backup
Once installed and rebooted you can use nmtui to connect to the internet via Wi-Fi. If you plan on using a wired connection from time to time you can skip this step.
Configure the writer deck
Here you'll find the alias I use, config and keybinding for vim and config files for tmux, kmscon and syncthing. Feel free to use and improve.
Only 1 alias needed
Edit your .bashrc file and add the code below:
As you can see ww will launch vim at the vikwiki index page inside tmux. And since we have the ww alias we also run it from this file. This way, when you login the vimwiki index page will open in a tmux session called vimwiki.
tmux
Create a tmux.conf inside the ~/.config/tmux/ directory with the following content:
vim
Inside your home folder create the .vimrc file and paste this in:
It's a minimal config which sets the blue theme, you can SPACE + cd to open up netrw and autosaves your documents. Make sure to checkout all of vim's themes by typing :colorscheme + TAB and choosing your prefered one. I prefer blue both day and night - Veronica chose the best theme in my opinion - but in case I'm somewhere outside and in need of a light theme I prefer peachpuff.
vimwiki
Installing vimwiki is easy. Just a git clone inside the right folder and we're done. No vim plugin manager!
That's it. open vim (or use the alias ww created earlier) and press SPACE + w + w. You should be asked to create the vimwiki folder inside your home!
kmscon
Setup kmscon to be the default TTY with the font we chose earlier: JetBrains Mono. Edit /etc/kmscon/kmsconf.conf:
Let's also enable kmscon on TTY1.
Enable kmscon only on TTY1. Just in case anything breaks you can still use your writer deck and fix things from another TTY. You can switch to another TTY by pressing CTRL + ALT + F keys.
Example for TTY2:
Autologin
Add this code above the line: ### Edits below this comment will be discarded
Replace sava with your username.
At this point a reboot is necessary. Reboot and see if kmscon has taken over TTY1, your user is logged in and you have that awesome JetBrains font.
syncthing
Syncthing is setup via the web interface which is accesible only via localhost. To make the interface available from another computer you have to edit the file and make it listen on all interfaces by editing ~/.local/state/syncthing/config.xml and set the address tag under gui to 0.0.0.0:
This way you can set up syncthing by using another computer that has a browser :-). It's the only thing in this tutorial that requires using another computer.
git
Not much to setup for git. You can save your credentials and add some aliases to make it easier to pull and push to the vimwiki repo (if you choose to backup your vimwiki to a repository - disregard git if you plan on using syncthing). The 2 posts below have some great info about organizing your .bashrc and using aliases:
Using aliases for complex and daily terminal commands
How I Organize My .bashrc with Imports
Other things you can do
SSH into the writer deck
I also installed openssh and enabled sshd. This way I can login to the writer deck from another computer and continue my work with the same settings, colors, keybindings and notes.
Use rsync instead of syncthing or git
Rsync is also an awesome tool that you can use to sync your notes/vimwiki between devices. You can add cronjobs to run rsync from time to time or create an alias and run it whenever you want to sync the vimwiki folder.
This will update all files if newer and also delete files no longer present on the writer deck. Perfect sync :D
Setup SSH Keys
If you plan on using rsync you'll have to enter the password for the remote server every time you run rsync. You can setup ssh keys and avoid passwords:
When prompted for a passphrase, press Enter twice to leave it blank. Leaving it blank allows completely password-less access. Then copy your ssh key to the other server with:
Wow, this really is a long post. I tried explaining every step the best way I can. Hope somebody reads it :-) ...